Fractured RLV
Contents
RLV
The Truth About RLV
A number of people have expressed concerns about using RLV or having RLV enabled in their viewer. While this has not been a large number of people, I decided to write this to address the issues they presented to me.
What is RLV?
RLV is an additional set of features that can be enabled in the Firestorm Viewer (and some others) to enhance the Realism of some roleplay experiences. It allows objects in world to send requests directly to your viewer. It was originally developed for use by the BDSM crowd but since its implementation has found a far greater audience due to the functionality it adds to the viewer.
Why would I want it?
The first reason is simple, some things will simply not function without it. The second is an example. Suppose you are exploring a beautiful garden and you touch a rose, the rose says “you unwittingly prick your finger on the rose and a small drop of blood forms. Without thinking you instinctively put the finger in your mouth”. Without RLV, no drop of blood forms and you don't move, all you see is the text. With RLV the rose would have given you a drop of blood texture, attached it to your finger and given you the proper animation and activated it. The whole scene would take on a whole new level of realism.
RLV means that other people can take control of me right?
Only if that is something you allow, and you always retain the ability to take control of yourself at anytime. Let me say that again, you must first allow it before it can happen. There are various permission and safety settings to prevent unwanted activities. But that is beyond the scope of the notecard.
Having RLV will make others think I am some sort of bondage freak right?
- Judge not lest ye be judged.
- People will think about you what they want.
- In your experiences in both RL and SL, how often have they gotten it right?
- If you are embarrassed don't tell anyone. If you don't tell them, they won't know.
RLV Quick Start
Firestorm is one of the most popular third party viewers, and comes with RLV support built in. These instructions should get you started if you are using firestorm.
SHORT INSTRUCTIONS:
For Firestorm:
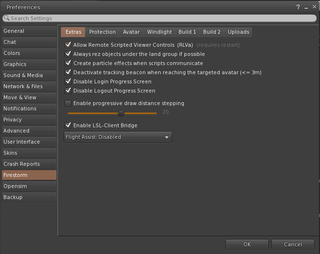
Avatar -> Preferences -> Firestorm -> General -> Allow Scripted Viewer Controls (RLVa)
relog.
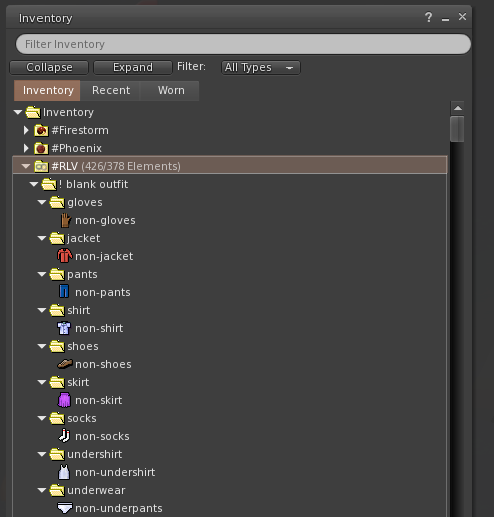
[inventory] Create -> new folder - > #RLV
wear the RLV Relay HUD.
LONGER INSTRUCTIONS:
| Basic Viewer Setup | Basic Folder Setup | Basic Relay Setup |
| About RLV | SmartStrip Folders | SmartStrip Relay Setup |
| AutoAttach | AutoAttach Folders | QUICK START |
LONG INSTRUCTIONS:
(If the short instructions didn't work for you, try this)
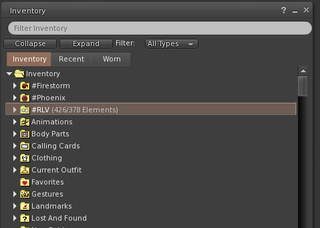
|
|
For more information on setting up folders visit [1]
- wear the RLV Relay that you got with these instructions. ((Satomi's Multi-Relay HUD))
Log off and log back on.
Setting up the RLV HUD
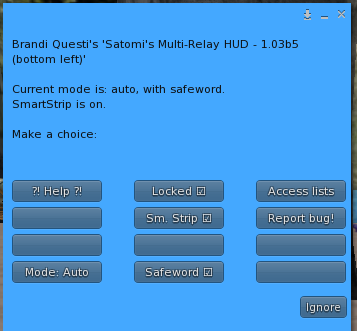
The hud Should be attached to your screen somewhere and is probably red.
- Click on the hud and a menu will pop up on your screen.
- Click on the [mode] button the menu will go away and come back.
- Do this until it says [mode:auto]
- Click on the locked button. There should be a check mark in the box.
- This prevents your RLV hud from being accidentally detached.
- Click on the safeword button and watch for messages on your screen.
- The box should appear to be half checked and you should see the message "RLV Relay: OK, a bit more fun! Especially when you are not alone!"
- Make sure the [Sm. Strip] box is NOT checked. ((Yet))
You are now Ready for Adventure. Enjoy.
Setting Up Smart Strip
Make sure your RLV Folders are setup
- Make a main folder in your inventory, not inside another folder.
- Name it #RLV -- those four characters exactly (Yes, 'exactly'! It is case sensitive.).
- Put outfits and restraints that you want others to use on you in folders of their own, inside your #RLV folder.
- Name the folders something short, unique and clear as to what they contain. For instance: #RLV>Restraints>Gag would be a sample folder set, with Gag inside Restraints, inside #RLV.
- Every item, such as a gag, needs its own folder even if it is only one piece. Similarly, every item put in the same folder as something else will go on at the same time as everything else in the folder.
For more on shared folders see Marine Kelley's tutorial at http://realrestraint.blogspot.com/2008/08/objects-sharing-tutorial.html.
Arrange outfits to work with Smart Strip
Smart Strip will remove all items that are in the same folder as the clothing layer. It is much easier for a user to remove a clothing layer with some confidence than to remove an attachment. So:
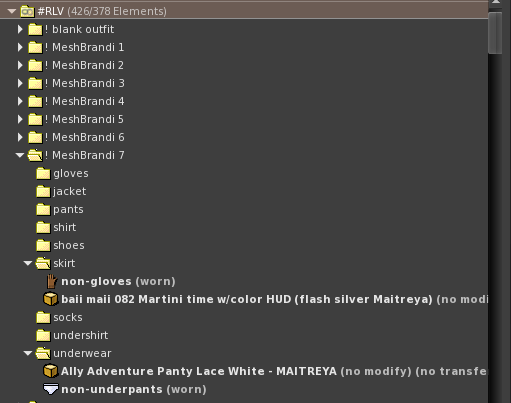
Suppose you have an outfit named "bikergirl", a unique outift name. In that outfit place your subfolders, named something clear and not the same as the outfit folder, for instance, "shirt", "jacket", "pants", "boots". *Do not name these folders "top" or "bottom" which are also system directory names and will be excluded from an rlv search.*
In each folder place the clothing layer, alpha layer and all attachments. For instance, "boots" might include a shoe base, ankle attachments, and alpha.
If the outfit subfolder does not have a system clothing layer, place in the folder a dummy clothing layer, provided in the #RLV Help notecard in the Un/Dress menu. For instance, a "shirt" subfolder might only contain a mesh shirt and an alpha. So place a dummy shirt layer there. When worn with the other contents of the folder, it will not be visible on your avatar but will target the shirt for smart strip in the Rem Clothing menu.
- NOTE avoid placing multiple copies of the same dummy layer in a single outfit, since sl will not allow you to wear two copies of an identical item.
- NOTE* Smart Strip can work with linked items, only if the links are to an original copy that is also in #RLV shared folders. Remember that the strip function by itself does not use folders, it identifies the actual worn item. But smart strip requires that item to be in an RLV folder for the next operation, which is "detach with this everything in the same folder". Therefore, the target of the link, the original worn item, must be in an RLV folder, and that folder must already be organized into groups that will be stripped with the item, since that is the folder the command will "see" when it strips the clothing layer. Too confusing? don't use links then.
Once the #RLV folder is built, a user can just browse the menu and select particular objects and outfits to wear or remove.
NOTE: If you place a + sign at the start of a folder name in your inventory, this also means "add"--it will add when the command issued RLV, is actually "wear".
.Hidden folders Any folder with a dot in front of the name will not appear in the collar menu, nor will any of its subfolders. For instance, keep a folder named [.hidden] in your RLV folders. Use it when sorting outfits you don't want to show in the collar menu.
Do not place a dot in front of a subfolder that contains items to be worn; when you issue an rlv command to wear the outfit, the subfolders will not be found. For Firestorm and other viewers with RLVa, only a chat command with that exact folder name will still find a hidden folder.
(nostrip) Add (nostrip) to the end of any item or folder containing an item that you do not ever want stripped by rlv. For instance, a folder contains a hair named blondie. If the folder is named blondie (nostrip) it cannot be stripped. Or if the hair item can be named blondie (nostrip) it cannot be stripped. This does not work for subfolders if only the top folder has (nostrip) at the end of the name.
