Difference between revisions of "RLV SMARTSTRIP RELAY"
From Fractured Reality
| Line 24: | Line 24: | ||
{| class="wikitable" border="6" style="width: 95%; text-align:center;" | {| class="wikitable" border="6" style="width: 95%; text-align:center;" | ||
|+<h1>Basic Relay Setup</h1> | |+<h1>Basic Relay Setup</h1> | ||
| − | |||
| − | |||
| − | |||
| | | | ||
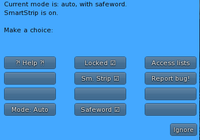
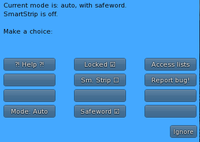
* Click on the hud and a menu will pop up on your screen. | * Click on the hud and a menu will pop up on your screen. | ||
| − | * Click on the [ | + | * Click on the [SmartStrip] button. |
| − | |[[File: | + | |[[File:rlv_relay6.png|200px]] |
|- | |- | ||
| | | | ||
Revision as of 16:22, 5 March 2019
| Basic Viewer Setup | Basic Folder Setup | Basic Relay Setup |
| About RLV | SmartStrip Folders | SmartStrip Relay Setup |
| AutoAttach | AutoAttach Folders | Quick Start |

